July 30, 2012

hello. {welcome friends}

hello.

welcome friends...welcome family...welcome to all...

i've been "busted"..."found out"...

{insert a special "shout out" to mrs. jessica k.}

maybe it was through having something pinned on Pinterest...or a linked up post on Tip Junkie...or Facebook...who knows...but my blog is no longer a secret unknown to those who know me best.

so, this post is mostly for you...for the ones who "found out"...{a little explanation}

*first, a special note* i fully expect you to leave a comment {only nice ones please}, and ask you please to start following me...there's a nice little "follow" button to the right...yup the right of your screen...see it?  click on it...choose to follow me {my blog}...i'd really appreciate it! plus, it would just be awesome to know who has been here {to put a name to the stat counter, if you will}.

so...grab a coffee {or your favorite drink}...

put on your readers {if necessary}...

belly up to your computer, laptop, iphone, ipad {whatever you have}...

and here we go...

when i started blogging a short while ago, i was nervous. i don't know why?  i considered blogging and wanted to start a blog a long while ago...well over a year and a half ago.  i just put it off, and put it off.

finally, one day i decided to "go for it".

i chose not to tell everyone about it {right away}, except my hubby, because i was a bit shy...i'm still not sharing it with everyone quite yet.  i didn't want to be judged {in a bad way} or criticized.  plus, i didn't know if it would last or something that i would really get into.

a couple of months later...it's going steady, and it's going really well.  i'm really enjoying it and having a great time doing it!  and, it has "stuck", or i've stuck to it.

i've enjoyed blogging about sewing, crafts, a bit of decorating, cooking and baking {oh who am i kidding...you know i don't cook and bake!}, and just a tad about being a mom, and "life".

now that i have some content and want to keep it up, i'm happy to share it with you all, but i thought i would wait until i got my custom blog design {which i am super impatient excited for!!!}.

you just found me first!

so welcome to you!  i hope you'll stick around {don't forget to leave a comment and follow along}.

thanks for visiting! hugs!
-R.


July 28, 2012

Olympic spirit {rally gear}

Whew!  Did you see the opening Olympic ceremony?  What a show!

We are super excited to watch the Olympics.  While we {of course} cheer for the USA {cuz that's where we live}, we enjoy watching and cheering on all the athletes regardless of where they are from.

Do you have your Olympic rally gear? So, there is a site where you can buy team USA gear...let me tell ya' it is super cute stuff.  Unfortunately, there is a price to match the cute duds.

We decided to improvise and make our own {or in some cases, reuse some of the red, white, and blue gear we already had}...you can too!

How about a stamped star, three tier, simple skirt...

Or how about a freezer paper stenciled top...
{freezer paper stenciling is an awesome way to "fight" a stain that you can't remove...just paint over it!}


It's even a great craft to do with your kids...

How about some easy hair bows...

These are just some quick and easy crafts to do {in between or even while watching your favorite Olympic events}...what will you make for "Olympic fun"?

Linking up to:

Thanks for stopping by, have a great weekend!
-R.


July 26, 2012

crafting with the kiddos {painting fun}

The kids and I were talking about the weather and temperature...my two year old piped in that it was "forty-five-twelve" degrees outside...that sounds HOT!  And, at times that is what the hot and muggy temps have felt like lately.  

It's not as hot as it had been, but still not very "comfy" to enjoy for a long period of time {especially for and with a baby}.

So, we've been hanging out inside...and doing more "crafting".

The kids love to paint {admittedly, sometimes I steer them from it because I don't always enjoy cleaning up the mess...}.  I thought it might be fun for them to make something to put in their rooms rather than the usual paper.  

So, I picked up a 3 pack of canvas boards for five dollars at Wal-Mart.

Pulled out some of the paints...

And let them go to town...

Little Miss "B" is into the abstract stuff...

I asked her what it was, and she responded "pink"...decent answer.

While my little "L" preferred a more thought out painting...


It was a nice and inexpensive craft to keep them busy {and distracted while their sister was gone having fun}.  PLUS, it gave mommy a bit of time to work on her new maxi dress!

How do you keep your kids busy and entertained in the heat?
-R.

July 25, 2012

pARTy...let the fun begin {the invites are off!}

The ART party planning is in full swing.


The invites are done and out!


I should have been at this point at least a week or two ago, but distractions, and things, and fun...it all slows one down sometimes. {We've only had this party figured out and talked about for over 2 months!!!}


Now, I know the invites aren't the swankiest and one might say they would have been better using a computer program, or cut using a fancy machine/tools {which I don't have}.  But... my daughter is pleased with how they turned out and she got to help, so that's all that matters.  Right?  It is her party after all.


Here's how they turned out...


And here's how the "making" of them went down...


First, we chatted about what she wanted, and then I did a "mock" invite to show her.


After hemming and hawing over what to make them out of {I bounced many ideas off of my hubby}, I decided on white matte board that I already had.


Cutting them was horrific as I had limited "tools" to use. {at one point I asked my husband if the jig-saw might work...that's how bad my fingers were hurting}


Originally I thought to stencil the "pARTy" onto the front, but the letters were too big, so I hand wrote them.

We painted little circles to look like paint on the "palette".


Last we added all of the party info on the back, and voila!


Now to get everything else together...can you believe my daughter asked if we could do one of my favorite things at her party...freezer paper stenciling!?  I'm trying to figure out how we can make it work...I think I've got some ideas!


Thanks for stopping by!  I hope you're having a wonderful week so far!!!
-R.

July 24, 2012

Mod Podge fun {pretty little notepads}

Confession...I have a problem buying notebooks.  I like to buy notebooks {and journals}...particularly cute ones, not the basic mead ones.

They're great to have to jot down notes, ideas, sketch, and so forth.  I keep them everywhere.  It's just more fun to write in something cute, right?

The other day I was at Target and saw some really cute notebooks and journals...and thought about some one.  But, it was around $5...for a small notebook with an uber cute cover, but simply lined pages on the inside {really nothing special}.

At that moment I thought to myself {1} "that price is ridiculous, you should spend that money on something better like a mocha frappe" and {2} "maybe I could craft my own".

And that is just what I did!

Last fall I bought a stack of these notebooks when they were on clearance at Target for twelve cents.
I have quite a stash of scrap book paper and "stuff" that has been gifted to me {but I just have never gotten into}.

Add in my new favorite craft...Mod Podge.

The end result...pretty little notebooks {at a fraction of the cost}!

For these, I started with my boring composition notebook.

Next I took a brown paper bag and mod podged a piece to the front and back covers of my notebook {to cover the ugly crackle looking covers}, and trimmed around the edges.

I decided not to cover the binding, but it would be easy enough to mod podge over as well.

Then, for this "design", I cut irregular strips of my scrapbook paper and mod podged them onto the brown paper cover.

I then added a little letter embellishment sticker to the corner and added a layer of mod podge over top of everything.

What are some of your favorite Mod Podge creations?

Linking up to:
Watch Out, Martha!
Debbiedoo's Newbie Party
Etcetorize: Make it Great Monday
destination craft
Adventures of a DIY Mom


July 23, 2012

{big changes coming...} mommy moments

So...I've got some news to share.

Big news...

OK, maybe not that big of a deal to you, but it is for me.

I decided it was time for a change...time to look a little "better"...

After much thought...and talking it over with my husband {who agrees it will be worth the cost}...

I'm getting a face-LIFT!!!  Yeah, hopefully next month!

If you're thinking cosmetic surgery - I gotcha!!!

I'm talking about my blog, silly.

I am so very IMPATIENTLY awaiting it.  I can't explain how excited I am to have something a little more ME.

Aside from that, I'm feeling crazy busy lately {and not with the things that I necessarily WANT to be doing}. Do you ever feel that way?

The owner of this crazy curly top...
recently started trying to climb on everything!  I feel like I am constantly chasing him and trying to make sure he doesn't fall.

My first baby is turning eight in a couple of weeks...
A girl after her mommy's heart {crafty and artsy}, wants to have an art party.  {FUN!}

However...she is very adamant that the invites be "home-made"...nothing store bought, nothing made on the computer...

So...here's the sketched out design we came up with...
 Do you ever have a really "good" idea, but then you start doing it and wonder 'what was I thinking'?

That's where I'm at with the invites...
I've been cutting, and cutting...out of matte board!  My fingers feel like they're going to fall off!!!

Hopefully I will have a finished product to share with you very soon...{after cutting these out it's very possible I could be showing a plan B}.


July 20, 2012

My Favorite Things {Friday}

Welcome, and Happy Friday!  I hope that you all had a fabulous week!

I decided to switch things up a bit...try something a little new...do a favorite things Friday post...{well, favorite besides my family, of course!}

We'll keep it short and simple because if I shared everything I'm lusting after loving right now...this would be a super long post {it might never end!}.

Lately I've had some decorating on my mind and have been "plotting" & scheming {as my hubby calls it} some ideas, particularly in our kids' rooms.

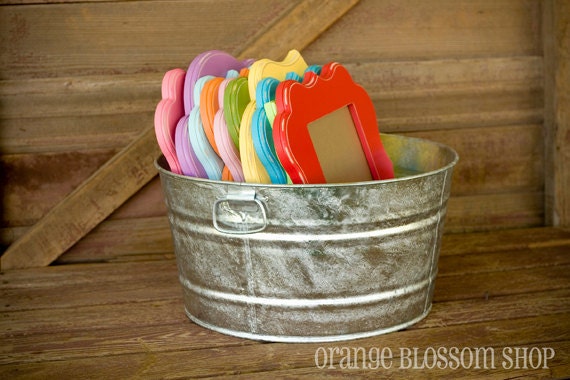
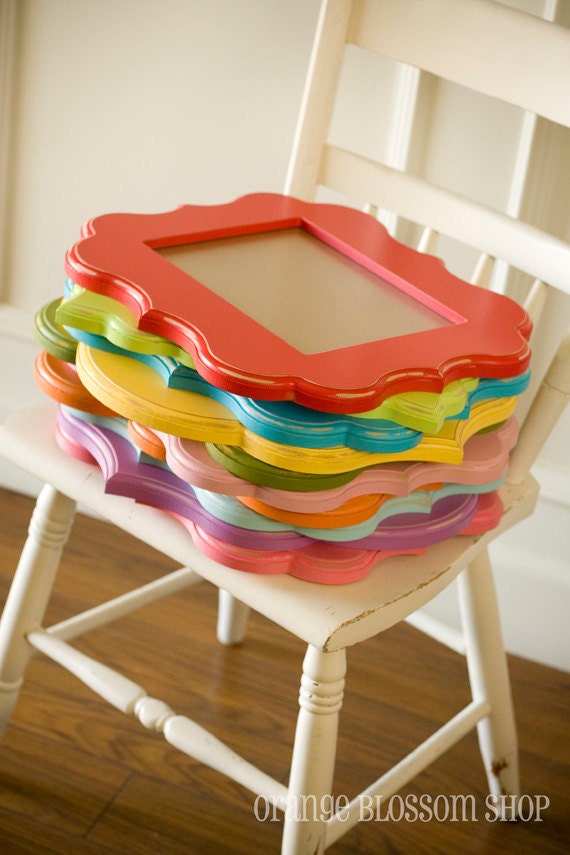
From Orange Blossom Shop I cannot get enough of these...
5x7 whimsical and unique picture frames. Pick your style and color
They're all SOOO beautiful...{sigh}...
16x16 whimsical and unique picture frame in the "ALY" style only
{source}
Would it be selfish to want them ALL???  Maybe a little.  I don't know that my children would be happy eating noodles every meal because mommy spent too much money buying everything from one of her favorite shops!

Orange Blossom Shop has so many beautiful products {even beyond these!}.

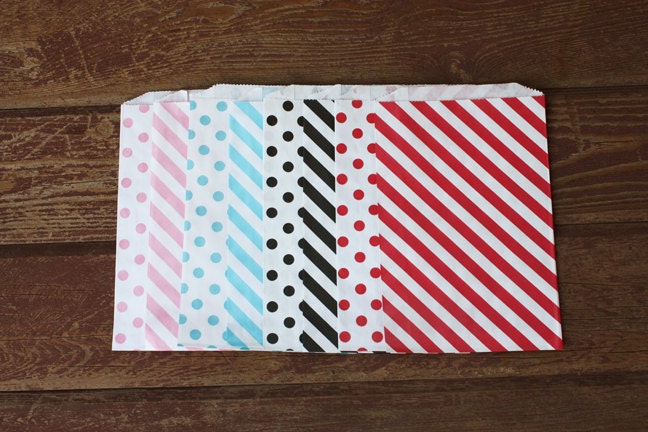
Like these...how stinkin' cute???
Cute Striped - Polka Dot Party Favor Bags - Bigger Bitty Bags

You can find them on Facebook too!

The other current LOVE for me right now...Shabby Apple!

Ahhh...L-O-V-E...I would wear their dresses everyday if I had them!

I recently got the Overboard dress and I just adore it!  {I just happened to have red wedges and a red belt that I had never worn with anything until...}

I tried to get photos, but...the self photo thing just wasn't happening.

Have a great weekend!!!
-R.


July 18, 2012

Welcome Wednesday {blog hop}

I'm so flattered...{I'm blushing!}

One of my favorite linkups that I have joined in my short blogging adventure is the Welcome Wednesday Blog Hop hosted by Take It From Me, and Happy Hour Projects.  I have found so many great blogs that I enjoy through this blog hop!


Much to my surprise...this week I am this week's Spotlight blog of the week.  I am so thrilled and honored!

If you do not already follow Take It From Me and Happy Hour Projects, I recommend you stop over and check them out.  They are both great blogs with awesome projects and posts.

You can join the blog hop too by clicking over to here or here, follow the simple steps and link up!

I hope you're having a great week too!  I'm feeling so "bloggy" loved this week, I'm giddy!!!
-R.

July 17, 2012

Bloggers are the best!

First off, I would like to thank the academy...


Seriously...blog friends are awesome!  It's amazing how wonderful and accepted complete strangers blog friends can make you feel...even when your blog is a tiny "blip" in the blog world.


I was very humbled when I received the Liebster Blog Award a little while back, and now I couldn't believe it when I received a comment from Emily at Entirely Emily saying she had nominated me for the Versatile Blogger Award!  Thank you Emily...so very much!!!

Blogging has been something that has brought me so much joy in the short while that I have been doing it.  I'm so excited to see what my blogging "adventure" will evolve into!

 Here are the rules for this award:
 1. Thank the Blogger who nominated you.
 2. Include a link to their site.
 3. Include the award image in your post.
 4. Give 7 random facts about yourself.
 5. Nominate 15 other Bloggers for the award.
 6. When nominating, include a link to their site.
 7. Let other Bloggers know they have been nominated.

Now, for seven random facts...{this could be hard...I always have a hard time with these things}

1.  I hate don't particularly care to cook or bake...all because of the clean up part.

2.  I am absolutely creeped out by feet {except for my kids' feet...they're OK still}...I find them so disgusting!  

3.  I am deathly afraid of mice and other furry little crawly creatures {rodents} with tails.

4.  I LOVE chocolate!!!  If it was healthy, my perfect breakfast would be chocolate cake with ooey gooey chocolate frosting.

5.  I have an impeccable sense of direction {even in unfamiliar territory}, people call me a human navigation system. 

6.  I love getting my hair done {even if it's by my kids}, if it was in my budget I would go to the salon once a week.

7.  My favorite movie ever is ELF...I watch it year round and it never, ever gets old.


And here are, in no particular order and not that I don't love you all because I do, the 15 blogs I want to nominate for the award:

{if any of you have received this award already, please don't feel as if you need to do it again}


20 going on 80


Adena at Food, Fun and Fotos


Melissa at Willamette Valley Wonder Woman

Mie at Sewing Like Mad


Heather at Setting for Four


Val at Home Made Modern


Rose at A Rosie Sweet Home


Michelle at Mumma and the Kiddo


Heather at Our Life in a Click

Alese at 2 Crafty 4 My Skirt


Marty at Marty's Musings 


Bronwyn at Queen B-Creative Me


Tamara at Etcetorize

Rosie at Craftbotic

Angela at Sunny Sweet Life


July 16, 2012

20 minute skirt {simple skirt switch up}

In the summer time I pretty much live in skirts and dresses.  They are so comfy and easy to wear.  Plus, I think my two year old appreciates me wearing a readily available napkin and towel for her to use...

The other day I made myself a "simple skirt" made even simpler...if that's possible. 

Instead of the normal "rolled" top elastic casing, I used four inch wide elastic {my theory is that the wide elastic helps to hide the tummy courtesy of my four children...I could be wrong}.


First, I made the simple skirt, omitting the top elastic waist casing part...if you don't know how to make one there are thousands of tutorials available by Googling "simple skirt tutorial".

For my waist band, I figured out how much of my wide elastic I would need...there are recommendations all across the board on how to measure your elastic.  I chose to cut the length to my waist measurement exactly and take my seam allowance out of it.  {I tried to add an inch originally, but it was too big and I didn't like how it fit.}

Sew the two ends of your elastic together, using a 1/2 inch seam allowance, very well {I go over mine a few times}.  

Then, open up your elastic seam, and sew the ends {seam allowance} down and trim.

Next, where you would normally do your elastic waist casing, I sewed a "gathering stitch" one half of an inch in from the top {in a contrasting thread}.

I gathered my skirt up a bit {but not all the way} to fit the elastic band.  Then I pinned the skirt to the elastic.

*The contrasting gathering stitch helps with the above step...I use it as a guide for where I should have the edge of my elastic.

I pinned the right side {visible side} of my elastic band to the right side {visible side} of my skirt.  When done you flip the elastic waist band "up" and your seam gets "hidden" inside your skirt along with your stitching since it can get a little "funky" looking when stretching the elastic and sewing.

Select a zig-zag stitch to attach your skirt to the waist band.

You will stretch the elastic to meet up with the "extra" fabric that wasn't gathered in when you sew.  You need your waist band to be able to stretch to put it on.  In the above picture my elastic band is on the bottom, and this is the "wrong" side {inside} of my skirt.

When you're done sewing around the waist band, "flip" the band up and your skirt is done!

My skirt took 20 minutes from start {cutting} to finish!

Thanks for stopping by!  
-R.


July 13, 2012

Seamingly Smitten Giveaway Winners!!!

I have the winners of my first giveaway...

My girls helped me with a good ol' fashion drawing names out of a hat...{OK, it was a bowl, but hat sounds better}.


Congratulations to *Di* and Kathryn, the two winners of the Seamingly Smitten Sewing Patterns giveaway!!!


Thank you to all who entered and stopped by!


Have a beautiful and happy weekend!!!
-Rhiannon.

July 12, 2012

Seamingly Smitten Sewing Patterns GIVEAWAY!!!

Today is the last day to enter the Seamingly Smitten Sewing Pattern giveaway.

TWO lucky winners will each receive TWO sewing patterns from Seamingly Smitten.

Here is the link to enter.

Check out Seamingly Smitten Sewing Patterns for yourself.  They offer trendy and patterns for women and children.

Good Luck!

July 11, 2012

Wedded Bliss Wednesday

*a little pre-post disclaimer...we had the most AWESOME photographer in the world {no photo shop needed by her}!  Her photos were and are amazing...however our wedding was pre-digital surge, so I had to scan our pics in, and our scanner {excuse me} sucks and clearly was dirty.  The clarity and color, saturation, etc. is so clear and amazing in the actual pictures! You can check her out here...

Wow! Nine years...really?

It's amazing how quickly time goes...I can't believe we've been married {almost} ten years!

I'd love to say that every single day has been perfect and a smooth ride, but it hasn't, and that's OK.  It makes the journey that much better.  I'm so happy and amazed at the life we have created in nine years.

I can still remember my wedding day so vividly!  It was awesome.  There is not a thing that I would do differently.

Planning was so fun and so easy!  Engagement date to wedding date...exactly five months.  Everything fell into place within the first month.

Our flowers...gorgeous! Even though my bouquet weighed fifty pounds...{OK, I exaggerate a bit}

My photographer...the best!  She captured everything about the day so perfectly...I wish my scanner was better and that I had the time to scan more pictures for you. My only tip ever to any couple getting married...get an awesome photographer {even if it costs a lot}!
{this pic is really where you see the "dirtiness" and horrible quality of the scanner}

Our cake was so tasty I purposely over ordered so there would be left-overs...

Our ceremony, quaint...in a small historic church.

Decor was pretty simple...mason jars filled with colorful daisies lined the aisles attached to the pews with ribbon.  A large beautiful bouquet filled the front of the church honoring our passed loved ones.

My something borrowed...my grandmother's wedding ring.  My grandfather had passed away three months before our wedding.

Our reception...a blast!!!  We had it on a large boat...on the way, we had the limo driver stop at Target so the wedding party could all get water wings to wear onto the boat as a joke...{it was good humor}
NOT a professional pic...but it shows the pink and blue water wings.

Sometimes I get a kick out of my married friends "pinning" wedding stuff on Pinterest...umm...we're already married?

If I was getting married today though, the one thing I would HAVE to do different...is get a dress from Tara LaTour {I know her!!!}...specifically The Angela dress...{sigh}.  I love it, love it, LOVE IT!

Happy Anniversary, Mr. P!!!

Cheers to a lifetime of love and happiness, and many more great years to come!

{seriously, I'm so terribly sorry for the poorly scanned quality of the pics!}


July 10, 2012

dressed up tote {it's in the bag}

Have I ever posted the pictures of my purse closet???  The one with all the cute COACH, Louis Vuitton, and Burberry purses and bags...No? Oh, that's right...I don't have one...sometimes I lust wish I did.


Oh well.  Someday soon enough, and I will post the pics of them all...{I'm very grateful for the ones that I do have, but a girl can dream, right?}


In the meantime, I make do with what I can.  With two kids through and done with diapers, and two more little ones currently in diapers, I am long over diaper bags! 


Once upon a time I was the mom with the awesome, cutesy, incredibly prepared, and organized diaper bag...somewhere shortly after my third child was born I got fed up with lugging the diaper bags and a purse and just resorted to large purses that I could put "it all" in.


Since my budget doesn't allow to be buying all the purses and bags that I like I have started to make them on my own when I feel the need for something new.


Behold my latest creation...


Nothing phenomenal...really it's just a "dressed up" tote bag that is lined and has metal rings to "jazz" it up a bit.


I whipped it up the other evening while my husband was playing Lego's with the kiddos. 


The fabric was actually a fabric sample that I had chosen for a design project I was working on four years ago.  The fabric was discontinued in the middle of the project and I liked it so much that I hung onto it {I figured I could make something out of it someday}.


I found the rings on clearance at JoAnn's a while ago for 63 cents!  The black fabric that I used for the lining was left over from another project and was just enough for the bag.


It works perfect for my needs...I can fit a few diapers and other child necessities in it, as well as my wallet and phone...and everything else that one might ask mom to "hold onto".


What are some of your favorite bags and purses to make?

Don't forget to check out and enter to win my current giveaway ...two patterns from Seamingly Smitten Sewing Patterns!
-R.